 This past weekend, I was in CA for my niece’s 2nd birthday. We went to Disneyland on her actual birthday on Friday. I’ve always loved the magic of Disney, especially around Christmas. I think she enjoyed the parade the most but was a bit confused when she met the big guy, Mickey Mouse himself.
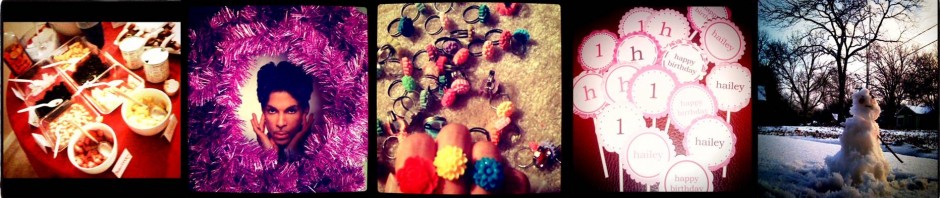
My sister and brother-in-law also had about 50 kids and parents over for brunch on Saturday. There was so much food and little people! The theme was winter wonderland, and I was in charge of the birthday banner, cupcake toppers, snowflakes, and snow globes for the kids.
Birthday Banner (spells “Happy Birthday” and six letter name)
- 5 sheets of 12×12 paper (I used 3 blue/3 pink glitter paper)
- 5 sheets of 12×12 white paper
- Ribbon
- Paper trimmer
- Cricut – George and Basic Shapes cartridge
- Tape/glue
- Hole puncher
Cut the 12×12 paper in half to make sheets of 6×12. For the background pendants, cut out triangles by measuring every 4 inches and cutting at an angle from one end to the 4 inch mark. This makes two triangles from each 6×12 sheet of paper. Using a Cricut or paper trimmer, cut out 5 inch triangles. Either print the letters on the white paper beforehand or use the Cricut to cut out 2.5 inch letters. Tape or glue the letters and pieces together. Punch a hole on two ends of each triangle and weave ribbon through. I also cut out penguins to add to each end. Simple project but takes about 2-3 hours depending on how fast you work.

Cupcake Toppers (makes 30)
- 1 sheet of 1.1 inch circle designs (here’s my Penguins cupcake toppers template)
- 2 sheets of 12×12 paper (I just used the scraps from the birthday banner)
- 30 lollipop sticks
- Circle cutter
- Cricut – Home Decor Solutions cartridge or scrapbook scissors
- Tape/glue
- Hot glue gun
Print out the template and use the circle cutter to cut out 1.25 inch circles. Using the Cricut or scrapbook scissors, cut out 2 inch circular shapes. Tape or glue the two pieces together and hot glue to a lollipop stick. These turned out a bit more like flowers, but I still think they look cute. Easy peasy one-hour project.

Snowflakes (makes 12 large, 12 icicles)
- 21 sheets of 12×12 paper (I used 7 pink, 7 blue, 7 white)
- Paper trimmer
- Scissors
- Tape
- Stapler
- Optional: fishing wire for hanging
I used this tutorial from wikiHow to make the snowflakes. I cut the 12×12 paper into 4×4 squares and made a template for cutting the lines. I also found it more effective to tape the middle roll and staple together the remaining rolls since the paper was so thick and kept popping off the tape.

The instructions are easy to follow, but I think it took somewhere between 6-8 hours to make 12 of these with all the cutting, taping, stapling of each layer and then each piece together. They do look pretty though.

Kids Crafts: Snow Globes (makes 20)
- 20 plastic cups
- 5 foam sheets or thick, stiff paper
- Scissors/craft blade
- Snow
- Sparkly snow
- Crayons/markers/colored pencils
- Glue
- Optional: Snow Globe printouts
- Optional: stickers
Cut out the foam circle base by tracing a circle about inch larger than the cup onto the foam and cutting it out using a craft knife. Cut out the snow scene template and cut tabs along the bottom. Kids can color in the scene or create their own figures. If drawing their own scene, allow space to cut tabs at the bottom. Glue the tabs of the snow scene or figures to the foam. Add some snow/sparkly snow to the cup and spread glue on the cup rim. Flip the scene onto the cup. Allow the glue to dry a couple minutes and shake. Optional: add stickers to the outside of the cup.

Quick waterless, glassless snow globe! This is a project best suited for kids 5-8 who understand that glue needs to dry. It didn’t work so well with my audience of 2-3 year-olds.
Quick Food Note: Mini Cereal Bowls
I also made my first recipe from Peter Callahan’s Bite by Bite cookbook—mini cereal bowls. It’s just melted marshmallow with rice krispies pressed into a mini muffin pan to create the bowl shape and then filled with yogurt and berries. You have to work quickly to make the bowls in the mini muffin pan before the rice krispies harden, but it was pretty easy. Aren’t they cute?

The cookbook’s definitely a great springboard for mini food ideas. I highly recommend it for your favorite host or hostess.
It was a full Saturday morning, but my niece enjoyed the crafts, bouncy house, and blackberries. It’s fun being 2.


you are a crafting machine! I am particularly impressed this time with your snowflakes and the little cereal bows. They both look so elegant! I hope to have a party to decorate and make these for sometime.
love love love your projects. id love to try the snow globe & mini cereal bowls ideas with my 5 yr old nephew !
Yes! I think he would enjoy it and he can just make his own snow scene.